scaling 3d drawing in sketchup
Scaling Your Model or Parts of Your Model
In SketchUp, y'all can resize and reshape your model based on the relative sizes of your edges and faces. Here'due south a quick overview of the available options:
- Scale your entire model with the Tape Measure tool.
- Resize entities while maintaining their proportions with either the Tape Mensurate tool or the Scale tool.
- Stretch or squish an entity to calibration with the Calibration tool. For case, stretch a cabinet so it'due south twice its electric current width or narrow a motorcar by 5 percentage.
- Scale a single component or every component in your model.
The following video shows how the Scale tool can scale geometry proportionally or stretch its dimensions.
If you're looking for details most scaling your entire model or detailed steps that walk you through SketchUp's scaling features, cheque out the sections later in this article.
Table of Contents
- Scaling your entire model
- Scaling a selection proportionally
- Stretching or squishing geometry to scale
- Scaling components
Scaling your entire model
When you lot desire to scale your unabridged model, use the Tape Measure out tool.
Tip: The Tape Measure tool enables yous to scale precisely by specifying the desired dimension betwixt two points. This line is referred to as the reference line.
To calibration an entire model, such every bit the floor program in this example, follow these steps:
- Select the Tape Measure out tool (
 ) or press the T key. The cursor changes to a tape measure.
 - Measure the distance between two points on your model. In this case, say yous know the width of the stairs needs to be 48 inches. Hither'due south how to measure that distance:
- Click one end of a line segment to set the starting point of a measurement. Use the SketchUp inference engine to brand sure you click the exact indicate.
- Move the mouse to the end point of the same line segment. As y'all motion the mouse, a temporary measuring tape line, with arrows at each end, stretches out from your starting indicate.
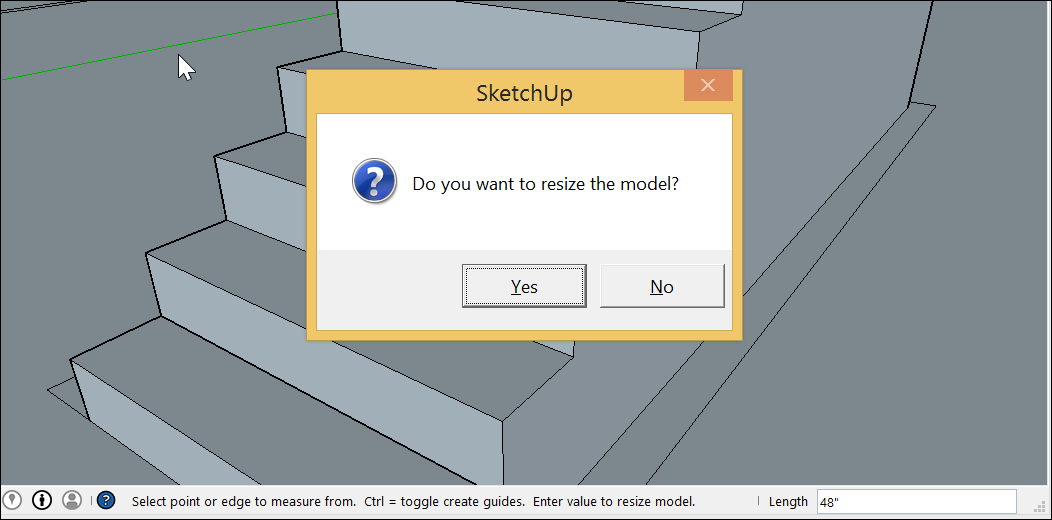
- Click at the other end of the line segment, equally shown in the figure. The last distance appears in the Measurements box.

- Blazon a new size for the line, which appears in the Measurements box, and printing Enter. This size is the basis for a proportional rescale of your model. In this example, the reference line is scaled to 48".
Tip: You can employ imperial or metric units. SketchUp understands both. Merely be sure to specify your desired unit if information technology's not your template's default unit.
- When the following dialog box asks whether you want to resize your model, click the Yep button, and the model is rescaled proportionally.
Scaling a selection proportionally
When yous desire to resize geometry within your model and maintain its proportions, yous can use either the Record Measure tool or the Calibration tool. Your choice depends on how yous want to fix the scale:
- To base the calibration on the size of a specific line, use the Tape Measure. For example, you discover out i room in your flooring program can only be x anxiety wide, only the residuum of the floor plan can stay the same. Or you know a statue must be three meters tall.
- To resize your option based on a percentage of your original size, utilise the Scale tool. For instance, choose this method if y'all want to increment your choice'south size by 200% or decrease it to 50%.
To scale part of your model with the Record Mensurate, follow these steps:
- With the Select tool (
 ), select the entities yous want to scale.
 - Context-click your selection and, from the context carte du jour that appears, select Make Group.
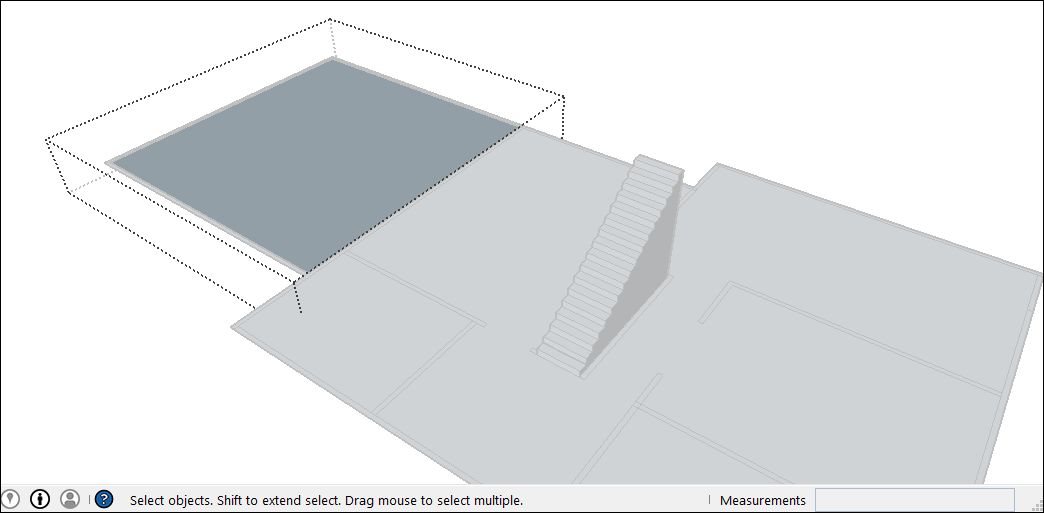
- Double-click the group. A box of dashed lines appears around the group, indicating that you lot've opened the grouping, as shown in the figure.
- Select the Record Measure tool () or press the T key.
- Click ane cease point of your reference line. Utilize the SketchUp inference engine to brand sure you click the verbal stop betoken.
- Click the other finish point of your reference line. The current distance appears in the Measurements box, equally shown in the figure. In the case, say y'all need to decrease this width to 10 feet, due to issues on the site where the floor programme will exist congenital.
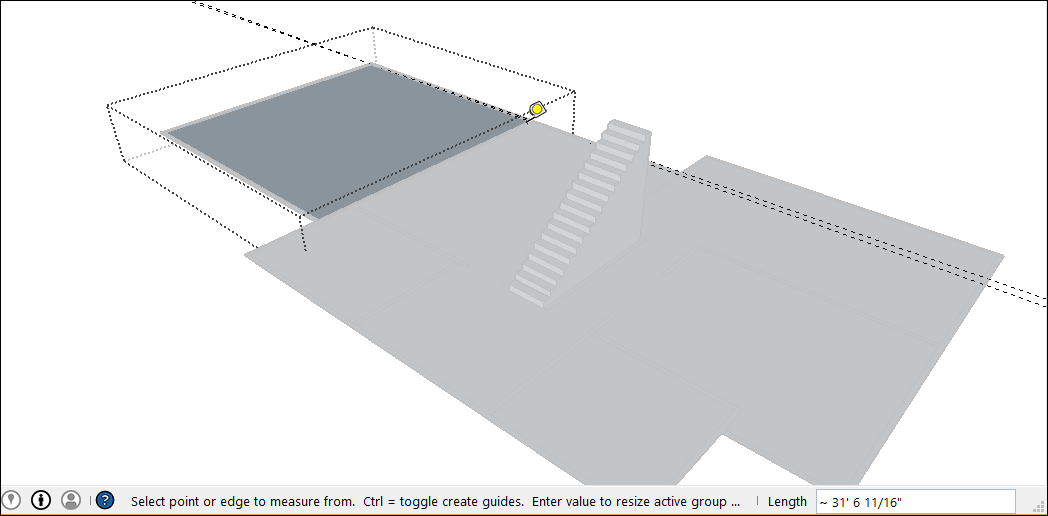
- Type a new size for the line (in this example, you type 10') and press the Enter key. This size volition be used as the basis for a proportional rescale of your model. SketchUp asks whether you want to resize your group or component.
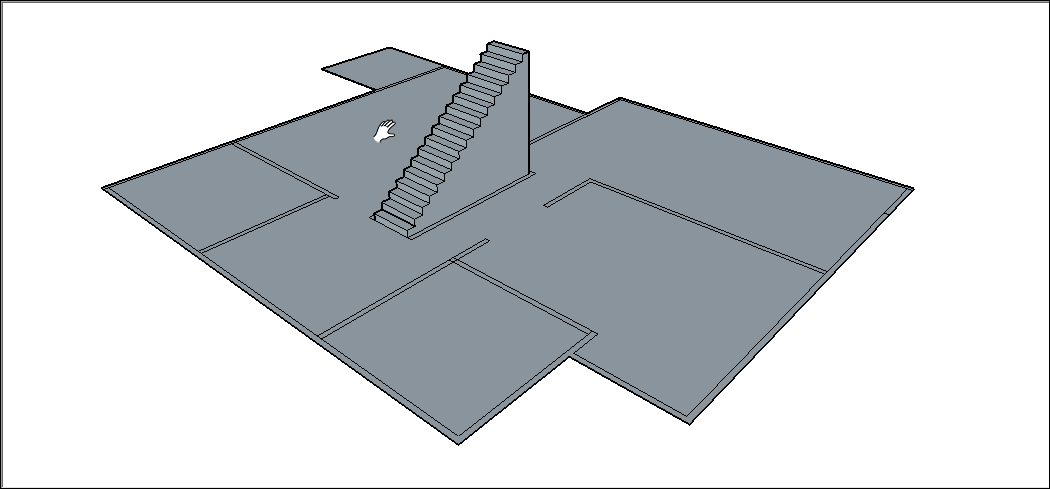
- Click the Yes button, and your selection rescaled proportionally. Check out the consequence in the post-obit figure. That'south a much smaller room.
Note: This process also works with components. Come across Adding Premade Components and Dynamic Components for an introduction to components. The Scaling components section later in this commodity explains how scaling simply affects a single component or all component instances in a model.
When you desire to scale your model proportionally by a percentage, the Scale tool can do the job hands. Imagine you're not certain how to talk to your client most decreasing a room in their flooring plan to x feet wide, so you model an elephant in the room while you remember information technology over. Here's how to scale that elephant, or any other selection in your model, by a pct:
- With the Select tool (), select the geometry you desire to scale. This stride is important if you lot want to calibration a complex 3D selection. If you have an easy selection, like a 2nd shape or a surface entity, you tin can skip this pace.
- Select the Scale tool (
 ) or press the Due south central. A yellow box with green grips appears effectually your selection, as shown in the figure. If you lot skipped Step 1, click the geometry with the Calibration tool cursor.
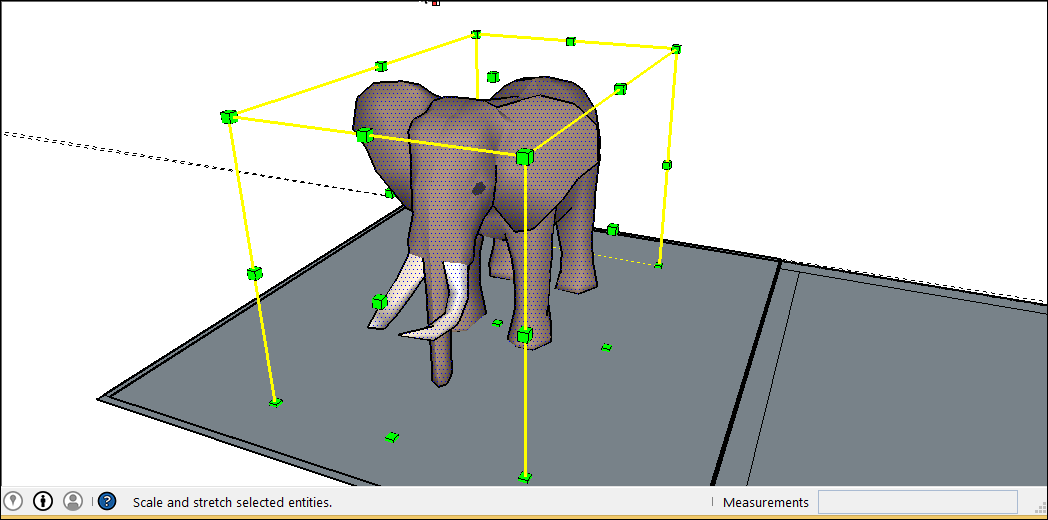
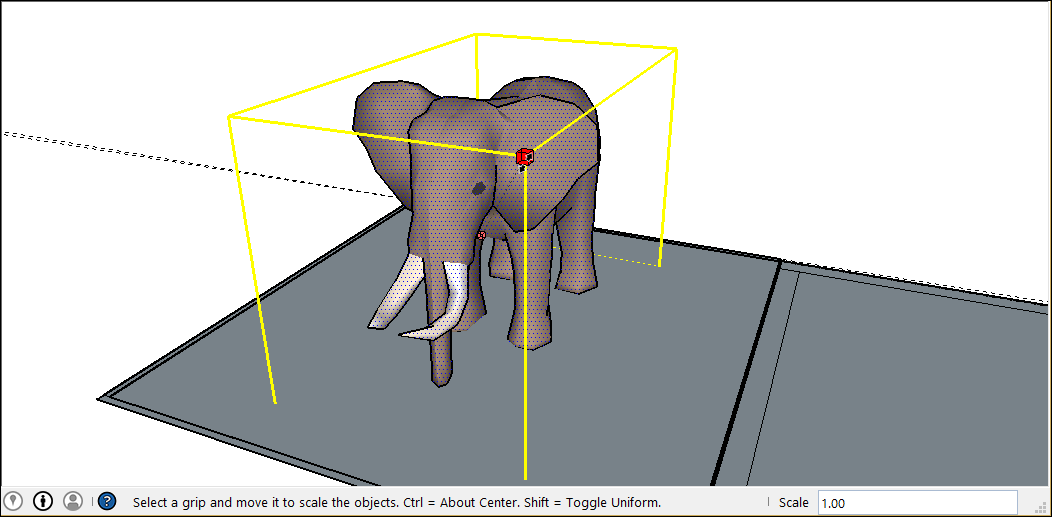
- For a uniform scaling, or one that keeps your option proportional, click a corner scaling grip. The selected grip and the opposite scaling grip plow cherry-red, as shown in the post-obit figure, and in the Measurements box, you run across a scale of ane.00, which means your geometry is at its original size, or scaled to 100%.
Alternatively, you can tap Shift to toggle Scale Uniformly which will prevent the Scale operation from deforming the geometry.
- Move the cursor to scale the entity. The Measurements box displays the scale dynamically. Press the Esc key at any point to kickoff over. To set the scale from the heart instead of the reverse corner, tap the Ctrl key (Windows) or the Option central (macOS) to toggle this functionality while you move the ruddy corner grip.
- Click to set your choice'south new scale. Or type the desired scale dimensions and printing Enter.
Note: Technically, in Step 5, you can type a dimension, such equally 2m or 3", instead of a calibration dimension. Still, scaling based on a dimension with the Record Mensurate is by and large more intuitive.
Stretching or squishing geometry to scale
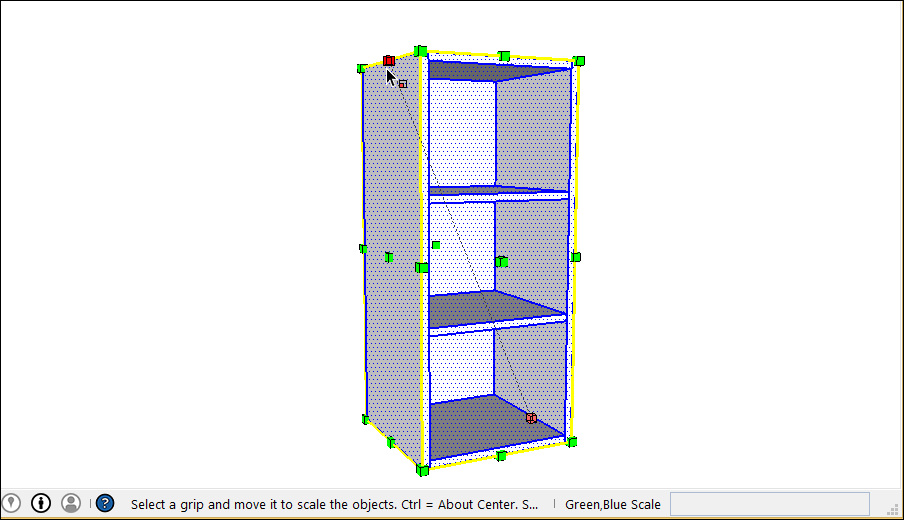
Sometimes, you lot need to scale only one dimension of a model (or maybe two). To practise so, utilise the Scale tool's edge or face grips. Here's how the procedure works, using a cabinet equally an example:
- With the Select tool (), select the geometry you lot want to scale. This footstep is important for a circuitous a 3D selection. Skip this footstep for an like shooting fish in a barrel pick, like a 2D shape or a surface entity.
- Select the Calibration tool () or press the S primal. A yellow box with green grips appears effectually your selection. If you skipped Step 1, click the geometry with the Calibration tool cursor.
- Click an edge or face grip (not a corner grip). The selected grip and the opposite scaling grip plow red, as shown in the effigy, and in the Measurements box, you lot encounter a scale of one.00, which means your geometry is at its original size, or scaled to 100%. The Measurements box likewise displays the axis management for your scale, such as Blue Scale or Ruby Scale. If you select an edge grip, you see two axes, such as Red, Dark-green Scale.
- Motion the cursor to scale the entity. The Measurements box displays the scale dynamically. Press the Esc key at any point to starting time over. To ready the calibration from the center instead of the contrary edge or face, tap the Ctrl key (Windows) or the Pick key (macOS) to toggle this functionality while you lot move the scarlet corner grip.
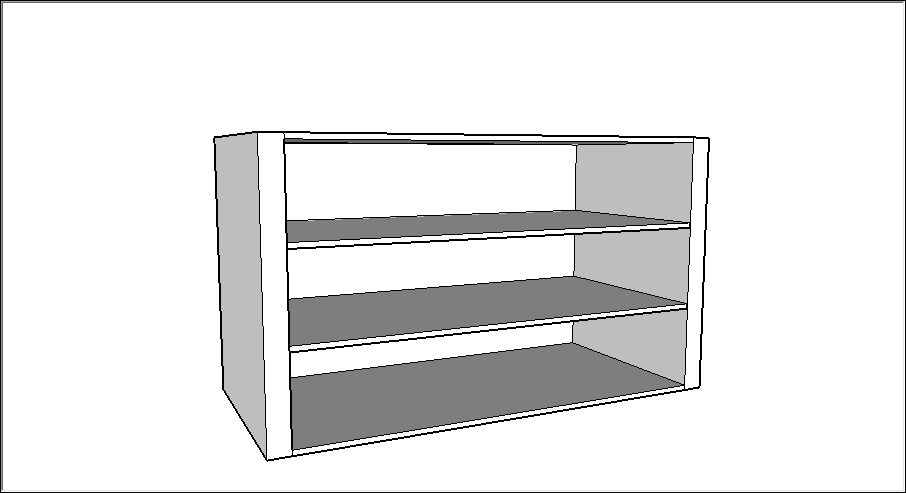
- Click to gear up your choice'south new scale. Or type the desired scale dimensions, and press Enter. To ready the scale on two or fifty-fifty three axes, type 2 or three numbers, each separated by a comma, such as iii,two. In this instance, y'all come across the original cabinet was scaled to be twice every bit broad but half the height.
Tip: If you accept trouble controlling the calibration direction, attempt repositioning the drawing axes to your selection. To practice so, select Tools > Axes from the menu bar. With the Axes tool cursor, click corner y'all desire to use to marshal the drawing axes. Then move the cursor then that it snaps the edge to which yous want to align your inferred centrality and click to confirm the change. (The inference is red, dark-green, or blue depending on the management you motility your cursor.) See Adjusting the Drawing Axes for details about working with the cartoon axes.
Scaling components
Yous can utilize these scale techniques on components too equally everyday geometry. (Run across Adding Premade Components and Dynamic Components for an introduction to components.) When yous scale a component, however, yous tin resize a single case of the component or all component instances in your model:
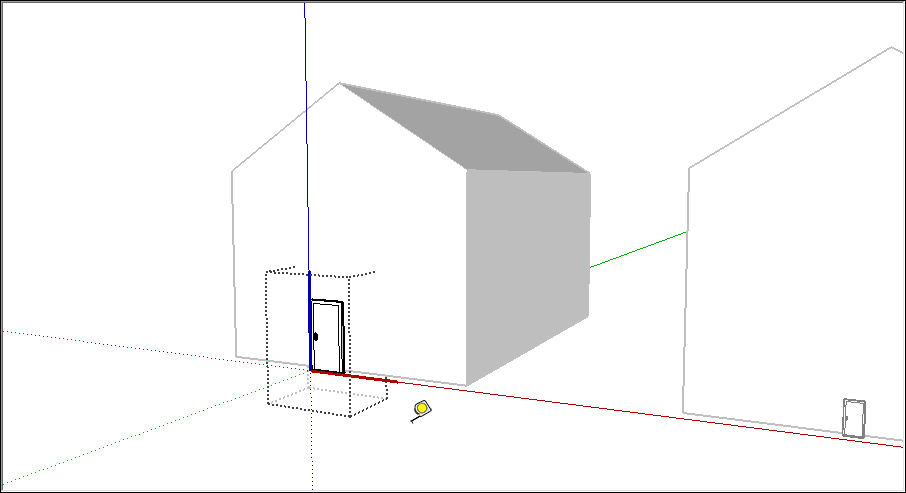
- Scaling a component changes just the private instance. This feature allows you to have differently scaled versions of the aforementioned component in your model. To scale a unmarried instance, click the component example with the Scale tool and apply the grips to fix the new scale, using any Calibration tool technique explained earlier in this article. The following effigy shows scaling a door component downloaded from the 3D Warehouse.

- Scaling an entity within a component scales every component instance. To scale an entity in a component, you need to open the component by double-clicking it. Dashed lines appear around the component, and the lines and faces within the component become editable, as shown in the post-obit figure. With the component open, you can, for example, scale a line entity. This action affects the component definition and, therefore, all instances of the component are scaled to lucifer. With the component open, you can select a line, and therefore can calibration with either the Scale tool or the Tape Measure tool, equally explained before in this article. Note, however, that a uniform scale using the Tape Measure tool is often the easiest manner to scale all components in a model.
Source: https://help.sketchup.com/en/sketchup/scaling-your-model-or-parts-your-model
Post a Comment for "scaling 3d drawing in sketchup"